Tuesday, October 4, 2016

DCWV & Chameleon Blog Hop

Hi guys! Are you as excited as I am for this DCWV & Chameleon Blog Hop?

Two amazing companies with incredible products, and I get to play with both of them and tell you about it! It's a great day!!

If you haven't heard of Chameleon Pens, they are innovative markers that allow you to get multiple shades of a color from a single pen! You can learn more about them on their Facebook page.

Here is the card I made for this exciting Blog Hop.


I used a couple of the Chameleon Pens to color this flower, found in the DCWV In Stitches Stack. It comes on kraft paper, which made for a fun blend of colors. The thread stitching on the flower took the color nicely, so I made sure to color them with the coordinating markers.


I then cut the flower out and added it to the front of this card I made with DCWV Solid Cardstock, Gold Threaded Burlap and a pink dot sheet from the Happy Day Stack. I also used the Pink Chameleon Pen to shade the edges of the pink paper.


Thanks for stopping by!


Thursday, August 4, 2016

Happy Birthday Tool Card - DCWV & Hobby Lobby


Here is a fun way to incorporate a gift card into a handmade card.

My favorite gift cards, are the ones from Home Depot, because they are so fun! They come in all shapes, events and ideas.
I am lucky my entire family loves Home Depot, so I get to make fun cards like this one.


I made this card for my Dad for his birthday last month. This awesome Saw gift card hung nicely next to the wrench and hammer I cut from the DCWV Embossed Foil Stack. I hung them off layers of paper from the DCWV Embossed Shimmer Stack and Double Sided Cardstock.


For the inside of the card, I used a couple paint chips where I would write my note, and decorated it with a paintbrush.


I hope you are inspired to craft your own gift card holder!


Monday, July 11, 2016

DCWV Personalized Gift Wrap


Hi everyone!!


I am a huge fan of personalizing gift wrap for all of my gifts throughout the year. 
Here is a customized gift bag and box for my niece's birthday gift.


For the paper flower on this box, I used the DCWV Watercolor Stack, and the stencil from the DCWV Paper Plants DIY Stack.


For this gift bag, I used a pink gift bag I had on hand, but added this large pennant, cut from the DCWV Watercolor Stack.


I cut the tag from the DCWV Paint & Create Guilded Geo Kit, and added some watercolor paints. I cut a tag from the Watercolor stack as well and placed it behind.


Sunday, June 12, 2016

Colt Layout

Introducing the newest member of our family... 
Colt R Anderson

My baby nephew surprised everyone, about 10 weeks early. He is the cutest, tiniest thing ever! I am so excited to be able to craft his scrapbook now too! (I make his older brother's scrapbook also)


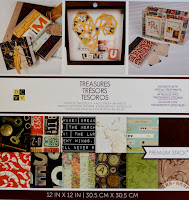
I used the DCWV Treasures and Good Wood Stacks for this layout. Both stacks had all of the perfect prints and embellishments I needed!


Like these fun Polaroid picture shapes.


And these tags with the perfect words!


I love the wood panel prints, so I made this 3D wood frame to 'frame' the layout. The wood alphabet blocks worked perfectly to spell out his name as well.


 [ Some products used on this project were provided to me for review by DCWV, but all comments, ideas and images are my own ]


Wednesday, June 8, 2016

Blue Moon Beads Tiny Worlds Owl Bracelet

Look how cute the Blue Moon Beads Tiny Worlds line is! This line comes with a variety of items you need to customize some incredible jewelry pieces. You can either use them separate, or combined with the enclosures to create a 'tiny world' jewelry piece.

Here I used the Tiny Worlds Owl set on my wood bead bracelet.


I used the owl as the bracelet focal piece, and then dangled the darling leaves off a small bronze chain.


[ Some products used on this project were provided to me for review by DCWV, but all comments, ideas and images are my own ]


Monday, June 6, 2016

Colt Layout - Featuring Epiphany Crafts!

 I am more than excited to announce that I have been accepted to be on the Epiphany Crafts Design Team!!

If you aren't familiar with their products, you need to be! Have ever bought epoxy dots, brads or stickers? Well, with the Epiphany Crafts Tools, you can easily make your own epoxy designs! You can make them in a variety of shapes, and use any print, so they match any of your projects!


Here is my latest layout, featuring my brother and his darling baby boy, Colt. I used the Epiphany Pennant Tool to make this perfect 'Proud' Pennant for my layout.


I was also able to make these coordinating wood print pennants to match the layout theme. Not only can you make any print you want, they are so quick any easy to make!


[ Some products used on this project were provided to me for review by Epiphany Crafts, but all comments, ideas and images are my own ]


Sunday, May 22, 2016

DCWV Watercolor Smile Card


DCWV EMBOSSED SMILE CARD TUTORIAL


SUPPLY LIST

DCWV Two-Tone Solid Cardstock
Tim Holtz Distress Ink in Dried Marigold, Ripe Persimmon and Seedless Preserves
Ink Blender Tool
Flower Embellishment
Chipboard Letters
Ruler
Scissors or Paper Cutter
Glue or Double Sided Tape and Hot Glue
Spray Bottle and Paper Towel


Grab your DCWV Embossed White Stack and find this floral sheet. Using Tim Holtz Distress Inks in Dried Marigold, Ripe Persimmon and Seedless Preserves, blend theses colors around a 7” x 8” area. 


Spritz some water on the paper and let sit for a few seconds, then blot with a paper towel. Repeat this again. 


With your blender tool, and the same distress inks, lightly add more color to the sheet. Make sure you do this lightly so the color only transfers to the raised design on the paper. This will give a little more definition and make the print more visible.
Set this aside to dry.


Find a solid color cardstock that coordinates with your inks. I chose a 2 tone cardstock from DCWV. The other side of this paper is a different shade.
Cut a 7” x 10” piece, and fold it in half.


On the front of the card, measure in 1/8” on the 3 sides. Using scissors or a paper cutter, cut off those 1/8” strips. 


If done correctly, once you fold the card, you will see the second color shade from the other side of the paper. This will give a border effect to the card. 


Cut a piece from your embossed floral sheet. The dimensions will vary, depending on the cut of your card base. I measured my piece so it will be constantly 1/8” smaller on all sides. 
Secure this piece to the card using glue or double sided tape. 


Grab some chipboard letters. I had these darling DCWV Polka Dot letters in my craft stash, but they were silver in color. I wanted them gold, so I grabbed my metallic gold spray paint and sprayed them. If you paint your chipboard, make sure they are completely dry before handling them.
Once you are ready, secure them to the card, centered horizontally. I used a ruler to make sure I applied them straight. 


Since the embossed paper I used was a floral print, I wanted to add some flowers to the card.
I dabbed this white flower on the distress ink pads to get a little coordinating color on them. I then hot glued them to the bottom right corner of the card. 


Now you have your finished card!


Monday, May 9, 2016

Mantra Me Jewelry

Do you love Mantras?


Have you heard of the new Mantra Me line by Bead Landing?

This line is incredible. They offer a wide variety of base options, such as bracelets and chain necklaces. Then, you can choose from small charms, mini tassels and plaques to attach to fully customize your jewelry.

For this bracelet, I used a bracelet base, a word plaque, a bead charm, arrow charm and a cute mini tassel.


This necklace is a combination of the chain base, feather connecting charm and a word charm to finish it!


This bracelet set is made from some beautiful Blue Moon Beads large beads, and a couple of the Mantra Me Charms.

The number of unique design combinations you can create are endless!


[ Some products used on this project were provided to me for review by DCWV, but all comments, ideas and images are my own ]