Sunday, March 26, 2017

Party Like A Flamingo Card + Envelope

Exciting news!!
I was accepted to be an ADORNitGirl Ambassador!
If you haven't heard of ADORNit, you can check out their site here.

I received my first box of goodies a couple of days ago, and I couldn't wait another minute to start crafting.


For my first project, I wanted to do a full tutorial so you can see the products, and just how easy it is to make a coordinating card & envelope by hand.


Party Like A Flamingo Card + Envelope


For this set, I used parts of these 5 sheets of paper and washi tape.


With my We R Memory Keepers envelope punch board, I made an envelope that will finish off at 4" x 6".


A few punches, scoring, folding and gluing ... We now have a darling pink polka dot envelope!


I chose the black sheet for the card, cut it 8" x 6", so it would fold down to a 4" x 6" card.

  I added a couple stripes of washi tape to the bottom of the card front, and cut a banner from the pink dot paper.


I cut this You Are Fabulous wording out of the sheet and layered in on top.


For the inside of the card, I cut this journal card out, glued it to the pink dot paper, and then layered that on top of a strip of washi tape.


The focal point of this set, is this saying! I love it!
I splattered some hot pink watercolor on it, and set aside to dry.


Once dry, I cut it down and layered it on the black paper.


Fussy cut a few of the cute flamingos, and attached everything to the front of the envelope.


Only a few minutes later, you have a handmade, one of a kind Card + Envelope!


[ Some products used on this project were provided to me for review by ADORNit, but all comments, ideas and images are my own ]


I hope you enjoyed this tutorial, thanks for stopping by!


Saturday, March 25, 2017

Birthday Gift + Gift Box - Product Mash Up

Hi everyone!

I needed to create a gift box for the upcoming 16th birthday of my niece. And what better way to celebrate, then pairing up some of my favorite brands and favorite products to craft the perfect, one of a kind gift box.

...and yes, I said sixteen!!!
I cannot believe it!

As one of the most important people in my life, I have handmade her everything she has ever asked for, not asked for, and even merely said she liked. She loves getting handmade 'everything' from her favorite designer aunt, so I can't help but spoil her.

So this birthday is special, she is working so hard towards getting her drivers license. What better gift then a customized key chain for those truck keys!


Blue Moon Beads Made Me line has this key ring combo, and you simply add some of their monogram stickers. I also attached a Wish charm from the Blue Moon Beads Mantra Me line, and then finished off with a pink leather tassel I had on hand.
Leaving enough space for her to add any other special charms she wants to carry with her daily.


Next gift is a necklace, made with the Blue Moon Beads Mantra Me line. The Chain comes designed like this, I simply added this tassel and Enjoy The Journey Ring.


For the final jewelry gift, I made her a silver bangle bracelet. Again, from the Blue Moon Beads Mantra Me line. I made it simple by just attaching the Have Courage plaque.
Making each piece with meaning and encouragement, as she has such a bright future ahead of her.


 Now, onto the packaging!

With a DCWV Gift Box, some Mod Podge and your favorite printed papers, you can create a fully custom box!
I used this beautiful sheet from the DCWV Neon Daydream stack.


Tied the box close with some textured May Arts Ribbon.
I easily made some tags with the Fiskars Tag Punch. Added this cute metallic gold American Crafts Diamond rub-on to the tag. Layered the paper tag with a round Hampton Arts Wood Tag, which I made pink with a few dabs of the Tim Holtz Picked Raspberry Distress Ink, and added some Tim Holtz Liquid Pearls Gold dots to.


My favorite part??
I simply drew a 'j' on black paper, traced the cut area, added the bubble cap and cut! Then, used Loctite to secure it inside the charm, and you have a personalized charm! So easy!


And there it is...
a finished, one of a kind, custom box for a soon-to-be sixteen year old!!


If you made it all the way to the end of this long blog, THANK YOU!!
I hope I have inspired you to create something today! 


Tuesday, October 4, 2016

DCWV & Chameleon Blog Hop

Hi guys! Are you as excited as I am for this DCWV & Chameleon Blog Hop?

Two amazing companies with incredible products, and I get to play with both of them and tell you about it! It's a great day!!

If you haven't heard of Chameleon Pens, they are innovative markers that allow you to get multiple shades of a color from a single pen! You can learn more about them on their Facebook page.

Here is the card I made for this exciting Blog Hop.


I used a couple of the Chameleon Pens to color this flower, found in the DCWV In Stitches Stack. It comes on kraft paper, which made for a fun blend of colors. The thread stitching on the flower took the color nicely, so I made sure to color them with the coordinating markers.


I then cut the flower out and added it to the front of this card I made with DCWV Solid Cardstock, Gold Threaded Burlap and a pink dot sheet from the Happy Day Stack. I also used the Pink Chameleon Pen to shade the edges of the pink paper.


Thanks for stopping by!


Thursday, August 4, 2016

Happy Birthday Tool Card - DCWV & Hobby Lobby


Here is a fun way to incorporate a gift card into a handmade card.

My favorite gift cards, are the ones from Home Depot, because they are so fun! They come in all shapes, events and ideas.
I am lucky my entire family loves Home Depot, so I get to make fun cards like this one.


I made this card for my Dad for his birthday last month. This awesome Saw gift card hung nicely next to the wrench and hammer I cut from the DCWV Embossed Foil Stack. I hung them off layers of paper from the DCWV Embossed Shimmer Stack and Double Sided Cardstock.


For the inside of the card, I used a couple paint chips where I would write my note, and decorated it with a paintbrush.


I hope you are inspired to craft your own gift card holder!


Monday, July 11, 2016

DCWV Personalized Gift Wrap


Hi everyone!!


I am a huge fan of personalizing gift wrap for all of my gifts throughout the year. 
Here is a customized gift bag and box for my niece's birthday gift.


For the paper flower on this box, I used the DCWV Watercolor Stack, and the stencil from the DCWV Paper Plants DIY Stack.


For this gift bag, I used a pink gift bag I had on hand, but added this large pennant, cut from the DCWV Watercolor Stack.


I cut the tag from the DCWV Paint & Create Guilded Geo Kit, and added some watercolor paints. I cut a tag from the Watercolor stack as well and placed it behind.


Sunday, June 12, 2016

Colt Layout

Introducing the newest member of our family... 
Colt R Anderson

My baby nephew surprised everyone, about 10 weeks early. He is the cutest, tiniest thing ever! I am so excited to be able to craft his scrapbook now too! (I make his older brother's scrapbook also)


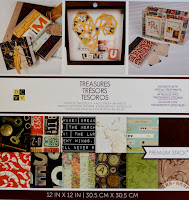
I used the DCWV Treasures and Good Wood Stacks for this layout. Both stacks had all of the perfect prints and embellishments I needed!


Like these fun Polaroid picture shapes.


And these tags with the perfect words!


I love the wood panel prints, so I made this 3D wood frame to 'frame' the layout. The wood alphabet blocks worked perfectly to spell out his name as well.


 [ Some products used on this project were provided to me for review by DCWV, but all comments, ideas and images are my own ]


Wednesday, June 8, 2016

Blue Moon Beads Tiny Worlds Owl Bracelet

Look how cute the Blue Moon Beads Tiny Worlds line is! This line comes with a variety of items you need to customize some incredible jewelry pieces. You can either use them separate, or combined with the enclosures to create a 'tiny world' jewelry piece.

Here I used the Tiny Worlds Owl set on my wood bead bracelet.


I used the owl as the bracelet focal piece, and then dangled the darling leaves off a small bronze chain.


[ Some products used on this project were provided to me for review by DCWV, but all comments, ideas and images are my own ]